Self Publish Your Book on Amazon, Step By Step Guide [2022]

Today, I just want to write about how to self publish your own book on Amazon, using KDP, Kindle Direct Publishing, which is Amazon’s free self publishing service. There was an outdates version on our blog and we updated it here for 2021. I’m going to show you how to publish a Kindle version of your book, as well as a paperback version of your book. 

Now, the cool thing about KDP is that anybody can publish a book on Amazon, for free, Amazon’s provided the opportunity for anyone, you don’t have to be an expert, you don’t have to be a best selling author, you don’t have to be, you know, have this incredible talent. If you have a message, if you have something that you want to put out there in the world, and you want to publish it on Amazon, you can do that and you don’t have to go through a traditional publisher. 

And that whole big process of what used to be, Amazon’s really changed the landscape so that it’s an equal playing field for everybody. If you live in India, if you live in Australia, Canada, US, Europe, Brazil, wherever you live in the world, you can leverage their platform, and you can publish almost anything that you want, whether it’s a shorter book, a longer book, Kindle paperback, the paperback platform they have is print on demand, which is pretty amazing. 

You don’t have to order a lot of inventory, and store that in a warehouse and ship it every time someone buys your book, the print on demand service that KDP has is when someone buys your book on Amazon, then they automatically print it and ship it to the customer on your behalf. So Amazon’s pretty amazing. They have millions of customers on their platform, and they provide an incredible opportunity for you. 

And the other cool thing is they make it very easy and very fast for you. In fact, if right now, you already have the file of your book, it’s already ready to be published on Amazon, and you have the cover of the book, you can go to this process in a matter of minutes, and hit the publish button. And your book will be live available for sale on Amazon within about 72 hours. 

But usually it’s about 24 to 48 hours. So if you’ve got all that ready, fantastic, you’re good to go, this video is going to help you with that. And if right now you don’t have a book, you don’t have a cover, I’ll show you some options on how you can hire a graphic designer to design a cover for you rather inexpensively. Or you can hire people to edit to proofread. Even to write the book for you. 

Keep also in mind that there are a lot of publishers out there that hire authors, work with authors and writers or ghost writers to create a book and publish it on Amazon. So that could be an option for you as well. So with that being said, let’s dive in. 

STEPS TO PUBLISH YOUR BOOK ON AMAZON

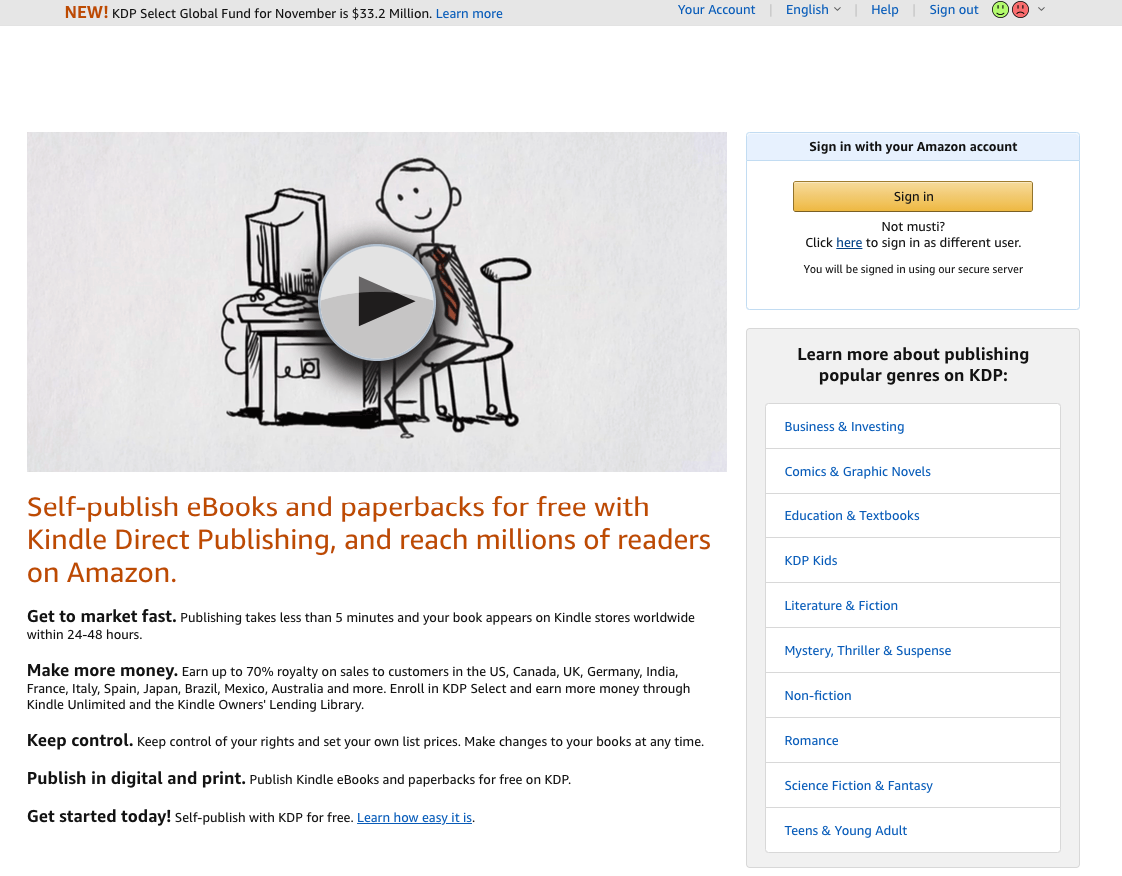
First, go to https://kdp.amazon.com, known as Kindle Direct Publishing, it’s Amazon self publishing platform. It’s free to sign up, you just need an Amazon account. If you don’t have one, you can click on sign up. If you already have a personal Amazon account, I’d recommend setting up a separate one just for business and self publishing, you do need a different email address for that. 

Here you can see some of the benefits publishing takes less than five minutes, your book appears on Kindle stores worldwide within 24 to 48 hours, you earn up to 70% royalty through their platform. And you can publish your book worldwide. So in the US, Canada, UK, Germany, India, France, Italy, Spain, Japan, etc. And of course, they allow you to publish the print version as well, which is really cool. When you log inside KDP you’re going to see the dashboard.

If you click here on the bookshelf, you can view all the books that you’ve published under your KDP account. Reports give you the data sales data, royalties, a lot of information about your books and how they’re performing, I encourage you to play around and browse their website and platform. 

But if you’re ready to publish your book, you’re going to click here for the Kindle ebook. Kindle is a little bit easier and faster than a paperback book. Because with a Kindle book, all you need is you need the book file in this specific format that’s required. It could be a doc file from like MS Word. And you’re also going to need the cover and the cover is going to be a flat cover that meets the dimensions of what they require. 

But that’s all you need to publish as a Kindle version paperback. On the other hand, you do need to format it for paperback but you also need a back cover and also a spine. So for example, the back cover of the book and the spine of the book is also going to be a requirement for that. ways you can get that done is hiring a graphic designer that can do that for you. 

BOOK COVER, TITLES, DESCRIPTION AND KEYWORDS MATTER A LOT

With a book title, of course, you want to make sure it’s catchy. Something grabs people’s attention when they see it, when they hear it. They say to themselves, I want to know more, they want to click. Here is an article that may give you some inspiration.

And if you’re trying to use Amazon search to optimize your book for different keywords, because Amazon’s a search engine, people go there that typing keywords to search for, that’s how they can find your book organically to buy it, then you might want to learn a little bit about different keywords that you can put in your book title that will help your book rank higher for those keywords, and attract more potential customers that come down here. Here is a step by step article to master Amazon kindle keyword research.

The edition number I’m going to leave blank that’s optional. For the primary author and contributor field, this would be the author name, this could either be your name, it could be a pen name, or pseudo name, it can really be any name that you want. This is something that is an option. For a lot of authors, a lot of publishers, Mark Twain is a pseudo name, a lot of celebrities have changed their names, for branding purposes and what it’s not their legal board name. 

So there’s an option there too, if you want to be anonymous or published under a different name, you’re free to do that. But you’re also able to also include any contributors as an option so if you want to, you know if you’re the publisher, and then there’s another author that wrote the book, and they have the rights to it, then you can use their name. If you have like an illustrator, editors, anything else you want to include, you could include that here as well. It’s all optional, but you do need to have a primary author or contributor name. 

Then system will ask for the book description, you have 4000 characters to write up a book description, you don’t have to use all 4000, although the more space that you use, and the more that you include here, it can help with the ranking of your book, even people finding your book in Google, based on different keywords that you might have here in the description. But the primary purpose of the description is for those that want to know more about the book before they buy it. So you want to share more about the book, perhaps what inspired you to write it or what they’re going to learn about the benefits of buying the book, you can include that here to intrigue someone and to get them to want to buy your book. 

So this is kind of like a sales copy area of where you’d try to sell people on why they should buy your book. I always like to include a call to action at the end of any sales copy. So just this last piece, get your copy today by clicking the buy, buy now button right now, having that CTA that call to action will direct people to go and buy the book. 

Here are the publishing rights. So you want to determine either if you own the rights, or if it’s public domain work. I’m going to click here, I own the copyright and hold the necessary publishing rights. If you wrote the book yourself, you’re gonna own the rights to it. If you hired a ghostwriter, and you pay them, you can make sure that you own the rights to the book, so they’re selling the rights to you. There’s also some instances of books that are public domain, anybody can republish, and if that’s the case, you’d want to select this here. 

Now is the keywords, keywords help people find your book in Amazon search, you can put up to seven keywords. I do recommend that you use it and that you use all seven, you want to use the keywords that are relevant to your book. So think what keywords when someone searches to find my book on Amazon, for your book, use all of them as that gives yoıu more chances to get listed on search results relevant to your niche. This article explains how to remove guesswork from your research.

Choosing the right keywords is very important because if you choose keywords and your book ranks for those, then you can attract more customers of your book. And knowing which keywords to target based on which ones are in high demand, which ones are getting a high search volume is important because if you choose some keywords that no one’s searching for, or that might be too competitive that even if you put that as a keyword, there’s no chance someone’s going to find you for that keyword then it’s kind of a waste of space using that. And so you really want to optimize your listing for the right keywords, the best ones and sometimes you have to come back and test different ones. You know once you publish your book, see where rank for different keywords. 

And you can come back and play around with that a little bit. There are some tools and software that help you do research on Amazon, to identify keywords and give you suggestions, and even share with you how much money certain keywords are making for certain authors and publishers of their book.

Next, you can choose up to two different categories. Categories are very important because this is where your book is going to rank and be listed in a variety of different categories on Amazon. And you can rank as a best seller in those categories as well. 

So each of these categories has a best seller list. And some categories are easier to rank in than others, they’re less competitive, and others are a lot more difficult. But different categories. Depending on who you’re trying to attract, it’s going to make a difference in potential sales that you’re going to get as well. So here I can choose fiction, nonfiction. This is a nonfiction book, you can see there are many different subcategories.

And now, you are ready to release my book now. Or I want to make it available for pre order, pre orders great if you want to release her book at a certain date in the future but you want to take pre orders right now, which can be useful to get some sales early to have a successful launch of your book. So if you’re good at marketing, and you have a launch strategy, you might want to set it as preorder. 

DO YOU NEED FORMATTING FOR YOUR MANUSCRIPT?

Next we’re on the section of the manuscript. This is your book that you’re going to upload to KDP and upload as a Kindle book so that it can be live on Amazon. It’s going to have some content guidelines, you might want to review to make sure that your book is compatible with what they require. You want to choose whether or not you want to enable digital rights management DRM, this basically means that you’re gonna allow people to unauthorized distribution of your book, you want people to be able to lend your book you may or may not. 

But when people download a Kindle book, they can lend it to someone or they can gift it to someone as well. But this is something you might want to know, review and decide which one you want to go with. 

In terms of the ebook manuscript, this is going to be the book file. The format’s they accept are doc x, that’s like Microsoft Word. doc file, ie pub, or kpf. So you can choose which format you want to to upload it as they do have their own platform to help you format your book yourself if you’d like. Or I’d recommend hiring someone to help you with that, because you want to make sure your book looks good on a Kindle ereader device and the formatting of it on a Kindle device is going to be a little bit different than on a paperback. 

Usually, for example, the Kindle version might have less pages and paperback because even on a Kindle device, someone can actually choose what size of font they want to use. And there’s a variety of factors that affect the length of the book. Kindle has their own formatting platform, which I can link to and share essentially right here. Kindle create is the one that can help you. After uploading your manuscript you are able to preview it, which is useful because I can preview it to see how it looks on a Kindle e reading device. Before I publish it, you want to make sure that you do preview your book to make sure there’s no errors or mistakes. Because otherwise that will lead to negative reviews, Kindle ebook cover, so here you need the file of your cover. Check this article for book cover design. The cover and the title are going to determine for the most part, whether someone buys your book or not, the cover must stand out to someone when they’re scrolling through Amazon. 

You can include table of contents, in your Kindle book, you can make it clickable. So when you include your table of contents, someone can click on it, and go to that chapter of the book. So that’s something that you could do for your book.

ISBN is optional. That’s something that is required for a paperback or hardcover print book, you’ll get that when you publish the paperback. The print cover, which we’ll get to in a bit is optional. You can put it here if you’d like. 

The next piece is KDP Select enrollment KDP Select is a program that you can enroll your book in with Amazon, which means that your book becomes exclusive on Amazon so it can’t be sold anywhere else. But on Amazon. And that is a contract that you agree to for 90 days and can always renew. In doing so you get certain benefits. For example, you can get more and more royalties because you can have your book. 

As part of a Kindle unlimited program, you can run a free promotion for your Kindle book, you can do a Kindle countdown deal, which allows you to offer a discount for your book for a limited time. They give you a lot of cool features and benefits to help market your book. It depends if you are planning on distributing this book on other platforms or selling it on your website. In that case, you can’t use this feature. 

HOW TO PRICE YOUR KINDLE BOOK?

But if you’re just going to stick to Amazon, I’d recommend enrolling in KDP Select territories as you decide where you want your book to be available on Amazon who can buy the book, you can select all territories worldwide or individual ones. So you can select all the individual countries that you want to make your book available, I suggest Worldwide.

Next is the royalty and pricing. So as you can see, they have two different pricing structures for a Kindle book. There’s 35% royalty, which means your book has to be sold in a certain price range from 99 cents to $200. Right here, but if you want the 70%, Amazon incentivizes you to sell it for 2.99 to 9.99 USD because they’ve determined that’s how they want to price books on their platform. 

If you select 2.99USD for example, you will get about $2.07 royalty delivery fee is three cents, and that depends on the size of the book. So the more the bigger the file size, then the more it’s going to cost for delivery, which is pretty much not much. I can also choose the other marketplaces. So here I can choose the price in India, the UK, Germany, France, Spain, Italy, etc. Right now is automatically being adjusted based on the US dollar price which is on amazon.com that’s a US marketplace. 

But people who want to buy it in India, UK, other countries, you can select the price for that in their currency. For book lending If you want to allow people that buy your Kindle book to lend it to other people, you may want to allow. Usually, it usually takes about 24 to 40 to 48 hours for your book to go live. Amazon sends you an email once it is live. 

And once your book is live on Amazon, you’d go to amazon.com, or whatever Amazon country’s platform and do a search for your book to make sure it is in fact live. Sometimes it might take a little bit longer, but it’s pretty rare. Your books should be there up on Amazon, and you can kind of see where it ranks for its keywords. You know that you selected and play around with that. 

But usually how Amazon will rank a book is based on the sales of it. So not just the keywords, but the more sales you get for your book, the higher it will rank for those keywords. So keyword optimization and marketing your book on Amazon is a very different strategy. 

PUBLISHING PAPERBACK VERSION

If you’re ready to publish your book as a paperback version, you’re going to come back to your bookshelf section of your Kindle dashboard. And you’re going to click on Create paperback with the draft of what you already set up. You do not need to fill in all the previous details, all you really got to do is to make sure everything looks good. Click on Save and Continue. 

Here’s where you get the ISBN. So you can just click here to assign a free, assign me a free ISBN. With the print options, they do have different options for that. Because it’s a print on demand service, whenever someone you know purchases the book on Amazon, they’re going to print it based on what you select here as the options. So you can select the interior and paper type, such as black, black and white interior with cream paper, or white paper or premium color. 

Of course, when you go higher quality with color, for example, it’s going to cost more money for them to print it for you. So that does cost more by using those options. The trim size is basically the trim around the book, the standard is six by nine inches, but you can select a different size. This information is important when you format your book. Because when you let’s say work with a designer, you’re going to give them this information. 

And everything else is going to set up as you did with the KDP, the Kindle version, and then you’re ready to set the price and then publish it on Amazon. If you want to get someone to write your book for you, and do the research of it, or if you want someone to proofread, edit, even find designers: the website I’d recommend for you is called Upwork (upwork.com). You can post a job and have people from all over the world bid on that. And it’s one of my go to places to find writers, editors, Proof Readers to support me.

I hope you enjoy this article and subscribe to our email newsletter for more. 

All the best.

Melissa Mayer

PS: I also prepared a Book Promotion Guide that you can combine with your keyword strategy to make your book a success.

PPS: You may find our Indie Author Checklist useful in your self-publishing journey.

All the best, Melissa Mayer.

SCRIVENER REVIEW [UPDATED FOR 2022]

SUMMARY

Scrivener is a desktop software that lets you compile all your research, character notes, and anything else you have to write your book in one user-friendly, convenient dashboard. I can describe it as a killer organizer tool that makes life so much easier for authors and writers. And it helps you avoid spending your most important asset: your time. This scrivener review is created for you to make an educated decision.

An important distinction to note that Scrivener isn’t a word processor like Microsoft Word. Rather it’s a tool whose main purpose is to support your writing by providing many valuable, smart, and unique features. 

It is a solution for all types of writers: best-selling novelists, screenwriters, students, academics, lawyers, journalists,  non-fiction writers, translators, and more. Scrivener is not there to teach you how to write but it simply provides everything you need to start writing and keep writing in a more efficient and educated way.

Although the app allows you to make edits like choosing fonts, justify text, and vary line spacing, that’s not where you’ll spend most of your time, it even can be a bit unproductive to focus on the final appearance of the document. It would be better to be brainstorming, work on the structure of your document, gathering reference information, and typing words. 

And when you’re finished, Scrivener can conveniently compile your work to a wide number of publishable and printable formats. And if you have been through any long-form writing process you would relate that such a tool saves you tons of time.

There are many ways you can use, customize this writing application to fit your needs as a writer. But with a small time investment in advance to learn, this tool could transform your entire world as a writer and self-published author.

Scrivener is available for Mac, Windows, and iOS, and will synchronize your work to each device you have. Scrivener is currently used by many writers at all stages of their careers. So It might be a very useful solution for you too taking into account that it is very affordable.

Get Scrivener 20% off by clicking here and enter the special discount code of GOGETSMARTER when purchasing.

SCRIVENER FAQs

What is Scrivener?

Scrivener is a desktop software that lets you compile all your research, character notes, and anything else you have to write your book in one user-friendly, convenient dashboard. I can describe it as a killer organizer tool that makes life so much easier for authors and writers. And it helps you avoid spending your most important asset: your time.

Is Scrivener free?

Scrivener is not free but offers a trial period. You can use all features for 30 days (not just 30 days from the date you install it). The trial version has exactly the same features as the full version but it will not work after 30 days of use. (If you use it every day, it lasts 30 days; if you use it only two days a week, it lasts fifteen weeks.)

How much does Scrivener cost?

The Scrivener Mac and Windows versions have a one-time cost of $49 ($41.65 if you’re a student or academic), and the iOS version is $19.99 (for iPad, iPhone, and iPod Touch). If you want to use Scrivener on both Mac and Windows you need to pay $80.

The latest version is Scrivener 3 and this Scrivener Review is based on latest version.

Note: No review is perfect so please let us know if you want to add any features to this Scrivener Review for 2022.

Important note: Scrivener 3 windows is still under development (at the time of writing this article). You can download the beta version here. The final Scrivener 3 windows release date is still not announced.

How to use Scrivener?

Scrivener offers quite a number of video tutorials (also available on YouTube), covering a range of topics from basic to advanced. 

Major online training providers also have full courses on how to use the Scrivener software to its maximum potential. We have checked several of them and I believe Learn Scrivener Fast is the best overall, but please do your own research.

Scrivener Review 2022

Scrivener is all about writing productively, and you will find below the important features of this amazing software.

1. Edit Your Script

The app provides a number of word processing features, it allows you to type, edit, and format words in ways you’re familiar with.

The toolbar on top of Scrivener’s Edit panel makes you choose the font, typeface, and font size of the text, make it bold, italic, or underlined, align it to the left, right, center, or justify it. Font and highlight colors are selectable, line spacing options, and a range of bullet and numbering styles are there in your service. So if you’re comfortable with Microsoft Word there will be no hassle here.

Images can be inserted into your script as drag and drop or from the Insert menu or paperclip icon. Images can be resized, but there is no image editing option inside the program.

We suggest not using fonts to format your text, but use styles. This way you choose the role the text plays (like title, heading, blockquote), rather than the way you want it to look. This is more flexible when it comes to publishing and exporting your script, and also helps in clarifying the document structure.

Note: No review is perfect so please let us know if you want to add any features to this Scrivener Review for 2022.

Keeping what writers need in mind, Scrivener lets you select a certain text block, and the number of words selected is displayed at the bottom of the screen, how cool is that:)

2. Give Structure To Your Document

Keep in mind that Scrivener offers many features that well-known word processors can not. That’s especially true when it comes to structuring your documents. That’s really handy and makes you write efficiently if you are dealing with long documents.

With Scrivener, you can break your document up into smaller pieces, and rearrange them hierarchically instead of displaying your document as one large one that you need to scroll up and down. Your specific project will consist of documents and subdocuments, and even folders. That makes you see the overall structure more easily, and you can rearrange the pieces as you wish. Scrivener offers two different ways to visualize all of this: outlines and the corkboard.

The ability to structure information in an outline and the efficient use of outlines is one of Scrivener’s greatest appeals to many authors. As you may see in the below screenshot, a tree view of your project is viewed on the left Editor pane. This is called the Binder.

This works similar to managing files or emails. You can view or edit any document by clicking on it, and rearrange the outline with drag-and-drop If you click on the blue Outline icon on the toolbar, you will see an outline of your project in the Editor pane on the right. This will show you a more detailed outline of the current document together with any subdocuments. In order to display the whole outline, you need to select the top item called “Draft” in my project.

Scrivener Review

Please note that the outline view provides several additional columns of information. You may customize the columns that are displayed.

The other way to get an overall view of your document is Corkboard, which can be found by the orange icon on the toolbar. This displays each section of your document as an index card.

Scrivener Review

If you rearranging these cards will rearrange the attached text in your document. It is possible to give each card a short synopsis to summarise the content in it (it may be an existing one or you plan to add). Corkboard will display cards for any subdocuments of the chapter you have chosen in the binder just like the Outline view.

Please don’t be inclined to type everything into a single document. Dividing a large writing project into smaller parts will be more efficient, will give you a better sense of progress, and the Outline and Corkboard will make you rearrange your project fast.

3. Tracking Your Progress

It can be useful and motivating to keep track of your progress, especially if you are writing a long document. If you have a bird’s eye view of which parts of a document have been finished, that will give you a sense of progress, and make sure that you didn’t miss anything. 

It is possible to add a different label to each section of the document. Scrivener uses colors for that purpose, but you can name them as you wish. In the below screenshot, a green label is added to any section that is completed. Then a column to display that label in the document’s outline is added.

Scrivener Review

An additional feature to track progress is Status. The status of any section of a document can be set to in progress, to do, revised draft, first draft, final draft, or done.

Just another way to track progress is the Goals or Targets sections. If your writing projects have a word count requirement, Scrivener’s Targets feature allows you to enter a word count target and deadline for your project, plus individual word targets for each document. You can set a word goal for your entire project.

BONUS For 20% off, buy through my link and use the code GOGETSMARTER.

And by clicking the Options button, set a deadline too.

Scrivener Review

If you click the bullseye icon at the bottom of each document, you can determine the character or word count for that specific document.

You can see how you’re doing at a high-level view by displaying Targets in the document outline along with a graph of your progress.

Scrivener Review

Scrivener also provides a wide selection of icons, Aas you see below screenshot the icon turned to green for each section completed.

Scrivener Review

It’s possible to include additional colors for the first draft, final draft, done, etc. It would be great to associate each document status with a different color icon, so when you change the status to Final Draft, the icon will automatically turn to green, but sadly that doesn’t seem possible.

Some people open an extra pane so they can view the Outline, Binder, and Editor all at the same time, and check the statuses/labels this way.

Note: Please let us know if you want to add any features to this Scrivener Review for 2022.

4. Research & Brainstorming 

One of the most important features of Scrivener is the way it allows you to work with reference material that’s separate from the words you are writing. If you are dealing with especially long and complex documents, keeping track of your research and ideas is very important. How Scrivener does this is also what separates it from competitors.

As we discussed before you can add different synopsizes to each document. That can be observed in the Outline and Corkboard, Inspector views, so you can go there to check as you type. And there’s a space to type some additional notes under the synopsis.

Scrivener gives you a dedicated section for your research in the Binder. It is possible to create your outline of ideas, web pages, and all types of other documents, and images/photos. If your document is short, it’s likely to keep the reference information open in your browser. But if you are working on a long document, there will be a lot of material to track, and the project will likely be long-term, so all those materials will need a more permanent space.

The reference section may contain Scrivener documents, which gives you all of the features you have when writing your actual project, including formatting.

It is also possible to attach reference information in the form of a web page, document, and images, just check the below screenshot.

Note: Please let us know if you want to add any features to this Scrivener Review for 2022.

Scrivener user manual is also very useful, which can be downloaded as a PDF document. 

5. Publishing the Finished Document

After you’re finished writing your document, Scrivener offers quite powerful and flexible publishing options. Like most writing solutions out there, Scrivener can export the document sections you select as a file in different formats.

But Scrivener’s real publishing power is in its Compile feature. This feature allows you to publish your document in paper or digital format in a number of popular document and ebook formats. There are many beautifully designed templates available, or you can choose to create your own design. You can export finished documents to Microsoft Word, upload them to Google Docs for final submission, proofreading, and editing.

Scrivener Alternatives

Scrivener is one of the best writing applications though there are alternatives. I will add more detailed reviews of alternatives as I get my hands dirty on some of them.

Conclusion

Writing is not easy and it is time-consuming, you need to do the planning, research, writing, editing, and publishing. Scrivener features are there to assist with each of these and give more power than its competitors.  Only the main features are discussed in this Scrivener Review, there a lot more of them for you to discover.

It is one of the best, powerful, and popular writing solutions, and I think the best for long writing projects. It is available as a stand-alone desktop application (no cloud versşon as of this writing) for Mac, Windows, and iOS.

The Scrivener Mac and Windows versions have a one-time cost of $49 ($41.65 if you’re a student or academic), and the iOS version is $19.99 (for iPad, iPhone, and iPod Touch). If you want to use Scrivener on both Mac and Windows you need to pay $80.

Scrivener has a bit of a learning curve but  It’s certainly not hard to learn, it is a complete professional solution offering a wide range of features than its competitors. You don’t need to know everything before you begin, just start using it and you will learn everything you need along the way. 

Their support is responsive, provides fast turnaround time, and is knowledgeable. They have video tutorials, user manuals, user forums, and FAQs.

If you’re ready to see how it can work for you, grab your copy for Mac (or for PC) here and use my special code GOGETSMARTER for 20% off.

All the best

Melissa Mayer

PS: You may want to check following articles too.

Amazon Keyword Research Explained Step By Step

Tips For Book Cover Design

Book Title Generators List (2020)

UPDATED LIST OF BOOK TITLE GENERATORS [2022]: MAKE AN EDUCATED DECISION

Your book title can make or break the success of your book. And it is not only important from literary perspective, let me explain. If people are not typing the words in your book title and/or description on Amazon search bar that means your title still needs some additional work. Book title generators can give you some inspiration.

At this point I want to give you some suggestions not only to make creative juice flowing but also make sure you have chosen your book title right using some proven techniques.

First, there are some incredible tools called book title generators that can be very helpful. In this article I will do my best to explain what a book title generator is, best free book title generators and some other tools to help validate your book title ideas.

BOOK NAME GENERATORS LIST

The first thing you need to know about book title generators is that they are niche specific. If you think about it, that’s quite logical, the approach for romance and children book titles are quite different. So choose the one from the list below that suits your book genre or you may end up with misleading results.

Non-Fiction Title Generators

Sci-Fi Title Generators

Fantasy Name Generators

book title generators

Romance Title Generators

Mystery Novel Title Generators

Horror Name Generators

Crime Book Title Generators

Children’s Book Title Generators

Comic Book Name Generators

Other Types Of Book Title Generators

At this point a word of caution (again): as I mentioned before you may find a great title from literary perspective but if people are not typing the keywords in your title, you will not be listed on Amazon search titles, unless you are well known author that people directly search for your name or book title. 

In order to figure out what people are typing into the Amazon search field, read this step by step article to learn about what keywords you must use in your book title and description that will bring you sales

After you find out the perfect title, make sure your book cover design and the internal book design are amazing as well to catch those Amazon shoppers.

ADDITIONAL TOOLS TO MAKE YOUR BOOK TITLES BETTER

The two tools below are for headlines, but they will give you additional ideas for titles too, quite relevant ones.

Take your best headlines and run them through this tool. For each headline you input you’ll receive an EMV percentage. The higher the percentage, the better the emotional resonance of your headline.

Advanced Marketing Institute’s Headline Analyzer

If you want to run your headlines through another tool, give this one a go. These results will give you an overall grade, score, and analysis of word types and structure. Once again, the grade matters. The better your grade, the better your headline, the better the conversion.

CoSchedule Headline Analyzer

WHAT ABOUT YOUR EXISTING AUDIENCE

If you have an existing audience on social media or a relevant, niche specific email list, you can also refer to them and ask their opinions on your book title ideas. That method may have a certain degree of bias.

I have another suggestion: you can use a survey tool PickFu. This survey service will take your potential book titles, find the target market for you, and have them vote on which title they like. Not only will you get to see which one is the best, you’ll get some key insight into why your target market loves one over the other. Basically, PickFu takes the guesswork out of it and gives you data (use code AUTHORS-WRITERS-POETS for 50% discount).

DON’T BE LAZY AND USE THOSE TOOLS

See, there are many tools to help you jump-start creative juices. Although they are not perfect, they are free and better than nothing.I can guarantee that you will feel more confident about your options after applying the methods above.

All the best.

Melissa Mayer

NICHE SELECTION: NO.1 FACTOR IN YOUR SUCCESS WITH SELF-PUBLISHING

It doesn’t matter whether we’re talking about Kindle, Createspace, or information product marketing.

If you choose the wrong niche — you’re doomed! Seriously.

And it’s the main reason I decided to make my life easier when it came to niche research; KindleSpy. KindleSpy cut my research time by a factor of x30.

Now, in just a couple of clicks, I know what book topic I should investigate further … and which to avoid. A little more research in Amazon’s search marketplace and after (maybe) 5 minutes, I’ve got my next book topic.

Here’s the process I go through, step by step using the tool called KDSPY.

First, I’ll navigate to a category to start my research, let’s choose; Health, Fitness & Dieting > Beauty & Fashion.

I’ll pull the results from KindleSpy, and we’re faced with this; I’ll then look at the SalesRank on the right-hand side, I’m looking for the first 20 (preferably 40) results to be under 30,000.

This instantly tells me the answer to the No.1 question on my mind whenever researching a broad category, and that is “Are There Buyers In This Category?”

The great thing about KindleSpy is, you don’t even have to rely on the SalesRank anymore and wonder how profitable it could be. it’s already worked out for you.

The estimated sales and sales revenue is given to you by this tool, right on the same screen and if you didn’t already know, these revenue numbers are all monthly.

This shows all 20 books in this category have an average sales revenue of $1,590 and at 70% royalty on anything above $2.99 you manage to get into the top of this category. You’d be looking at a passive income of just over $13,300 per annum from a single book. Not bad eh?

Check this article for step by step process.

Even by pulling 40 results, our average sales revenue is still at $1,164, giving you a 70% royalty figure of $9,777 per annum — not too ‘shabby’ at all. So, what’s next? Ok, so we’ve figured out there are buyers in this category. Obviously, people are interested in not only looking after their health but their looks too. Makes sense, right?

And our average sales rank across the top 40 results is healthy too. There’s healthy sales revenue spread nicely over a bunch of books and not just a handful. There’s plenty of reviews on these books (… another sign of a healthy market) and if we’re to get a book in the top 40, we’d be looking at an average passive income of $9,777 per annum from a single book here.

Assuming you could maintain a top 40 position, consistently. Not easy. But not impossible either. Especially when you learn about the ninja tactics on leveraging Amazon, correctly.

Sure you may think you know about how to do free KDP Select promotions to get downloads, leading to a bump in sales … but, stick with me in this series and I’ll reveal the (evil) KDP leveraging secrets. Secrets that allow me to get results, like this.

The next question we need to ask ourselves … Once we’re happy with a category is “What Topic Shall I Write About Here, That Will Actually Sell?”

This will be the topic for one of our next posts.

Check this article for step by step process.

All the best.

37 WEBSITES FOR BOOK GIVEAWAYS

Some of those websites offer paid listings and they claim this increases downloads 10%.

I haven’t tried so I can not comment, just try yourself if you want to.

All the best.

PS: Please let me know if you have a good alternative to add to the list.

CANVA REVIEW [2022]

WHAT IS CANVA?

Canva is a great suite of graphic design tools not only for desktop but for Android and iOS mobile platforms. You can literally use it to design almost all graphical design types you may want (for almost all listed items below there are tons of ready to use templates):

  • Book Covers
  • Ebooks 
  • Posters, flyers
  • Regular and video presentations
  • Infographics
  • Social media assets like posts, backgrounds, stories, covers
  • Invitations
  • Advertisements
  • Resumes
  • Magazine covers
  • Photo collages/cards
  • Logos
  • Animated graphics
  • Thumbnails
  • Wallpapers
  • Banners
  • Remove backgrounds
  • Mind maps

The best part is there’s almost no learning curve, Canva has a very intuitive and easy to navigate user interface. That’s great if you are not an advanced user like me.

what is canva

If your main business is not graphic design, you probably do not want to spend hours designing, say a book cover or cool looking Instagram Story. You can create one using one of the templates that suits your taste and you are finished in less than 5 minutes. I imagine trying to achieve the same results using Photoshop, well, Canva may be giving me 10X time saving.

The app covers an impressive number of use cases and comes packed with an impressive number of features too, whether you need to add text and stickers to a photo or completely revamp the theme of a brochure. Read on for our full verdict on Canva.

Get Canva For FREE, click here

CANVA FEATURES

As I mentioned before, you can easily use one of the templates for any design purpose you may need but it is also possible you start with a blank slate and build your design up however you want.

Canva includes a huge number of editing and layout tools: from image cropping to blur effects to background removal. Design objects can be easily arranged and layered in a project and it’s quite easy to add extras like text with beautifully selected fonts, captions or stickers on top of your design.

Canva creators are proud of being simple to use for anyone, with or without graphic design experience, and it’s totally true that the templates and intuitive features mean you can create designs that look professional very quickly. Even experienced design professionals can also use it to get a job done quickly, as long as they do not need too much control on what they are creating.

how to use canva

This tool has both handsome free and paid plans. Both types of users have access to thousands of different templates among more than 100 categories to get started. But paid subscribers also get access to millions of stock photos, videos and design elements to use as they wish.

You can literally use it from the simple task of tweaking your daughters photos to putting together a fully fledged social media campaign. Did we mention that you do not need to install any software, it is cloud based (run on your favorite browser) so you can just jump right in and start using creating. I have to admit that sometimes I just use it for fun without any specific job to be finished (did I just say that aloud).

Get Canva For FREE, click here

HOW TO USE CANVA?

Canva’s most appealing feature is that everything really is very well laid out and organized. Just select what it is that thing you’re trying to design, and you will be presented with a wealth of different templates and layout options, as they have thousands of users, they exactly know what you need most and where.  Canva has thousands of templates and even a free plan gives you many options to play with. 

The first step is to choose a template or a blank page then organizing the design object to your liking is very straightforward. You can change the whole design – select colors, fonts, background images – with a couple of clicks, so it will not take too much time to start personalizing the template so it fits with your brand image or your visual taste.

In terms of layouts, Canva is a bit restrictive compared to professional applications – you can take full control over where everything is in a design, but there’s not quite the same level of depth in terms of pixel-by-pixel tweaking. Still, Canva does a great job of keeping everything simple for beginners while also packing in plenty of features to cater for more ambitious designers.

YouTube video
CREATE AN EBOOK FOR FREE WITH CANVA

As you move design elements on the design canvas, guides popup to help you to keep everything in place and looking consistent, swapping parts of a design (such as a magazine cover or ebook page design) can be done with a couple of mouse clicks. Canva makes the design process stress-free, time efficient and intuitive.

The same ease of use approach is there in the mobile version as well: but creating a graphic design is not very convenient on smartphones due to screen size. Yet you might still be surprised by the quality of work you can create on your mobile. I use it on mobile to quickly create social media posts, especially stories.

how to curve text in canva

Get Canva For FREE, click here

HOW MUCH IS CANVA PRO?

You can start using Canva for free, which is a good way to dive in and see yourself whether or not the tool is suitable for you. Free plan gives you access to some 25,000 templates, 100+ design types, and many of the layout and editing features you may need. To be honest it’s a very generous free plan, and it will be more than enough for some people.

But if you want to use following features you will need to upgrade to paid plan; Create a Brand Kit and upload your own fonts and logos, One-click design, Magic Resize, 420,000+ free templates with daily new designs, 75+ million premium stock photos, videos, audio and graphics free-to-use, Save designs as templates for your team to use 100GB of cloud storage, heck they even have a social media content scheduler for 7 major platforms, how cool is that.

Canva Pro (as of this writing) is US$12.95 per month and Canva Enterprise is US$30.00 Per month for up to 5 people. There are some discounts if you sign up for annual plans.

how much is canva pro

CONCLUSION

If you compare Canva with professional tools like Adobe Photoshop, After Effect it’s nowhere near the level of complexity or number of features, but then not everyone is looking for what Adobe Creative Cloud has to offer. Those professional tools have steep learning curves and are very expensive, they are mostly for those people who make a living using them. But the majority of people need a simple, affordable tool to get a job done quickly, beautifully with no learning curve: that’s the gap Canva fills in for years, thousands of happy customers are proof of that fact. 

What I would suggest is to sign up for a free plan and play with it. If the free version is ok no strings attached and if you need more of what Pro plan offers go for it, it’s worth your money. Today, great visuals are very important whether you are an author, social media manager, marketer or a school teacher (remember Pro plan can be used by up to 5 people, so it is literally 2.6 USD per person per month).

Get Canva For FREE, click here

Let me know if you have any questions about Canva, I will be happy to answer.

PS: I also prepared a Book Promotion Guide that you can combine with your keyword strategy to make your book a success.

PPS: You may find our Indie Author Checklist useful in your self-publishing journey.

All the best, Melissa Mayer.